


How to Make Masks
CDC on Homemade Masks
- CDC recommends that people wear masks in public and when around people who don’t live in your household.
- Masks should NOT be worn by children under age 2 or anyone who has trouble breathing, is unconscious, incapacitated, or otherwise unable to remove the mask without assistance.
- Do NOT use a mask meant for a healthcare worker. Currently, surgical masks and N95 respirators are critical supplies that should be reserved for healthcare workers and other first responders.
CDC recommends that you wear masks in public settings when around people who don’t live in your household, especially when other social distancing measures are difficult to maintain.
Masks with at least 2 layers of fabric are most likely to reduce the spread of COVID-19 when they are widely used by people in public settings.
Simple masks can be made at home using washable, breathable fabric and may help prevent the spread of COVID-19.
Sew and No Sew Instructions
Sewn Mask
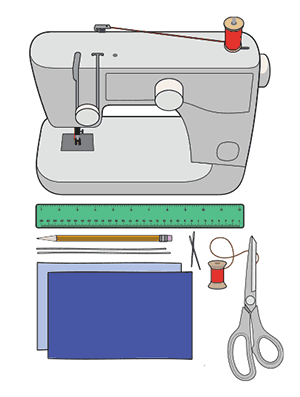
Materials
- Two 10”x6” rectangles of cotton fabric
- Two 6” pieces of elastic (or rubber bands, string, cloth strips, or hair ties)
- Needle and thread (or bobby pin)
- Scissors
- Sewing machine
Tutorial
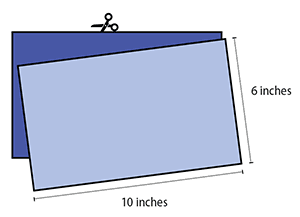
1. Cut out two 10-by-6-inch rectangles of cotton fabric. Use tightly woven cotton, such as quilting fabric or cotton sheets. T-shirt fabric will work in a pinch. Stack the two rectangles; you will sew the mask as if it was a single piece of fabric.
2. Fold over the long sides ¼ inch and hem. Then fold the double layer of fabric over ½ inch along the short sides and stitch down.
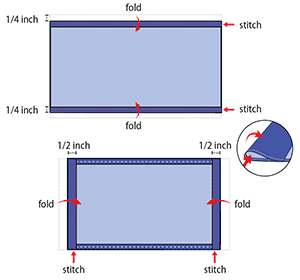
3. Run a 6-inch length of 1/8-inch wide elastic through the wider hem on each side of the mask. These will be the ear loops. Use a large needle or a bobby pin to thread it through. Tie the ends tight.
Don’t have elastic? Use hair ties or elastic head bands. If you only have string, you can make the ties longer and tie the mask behind your head.

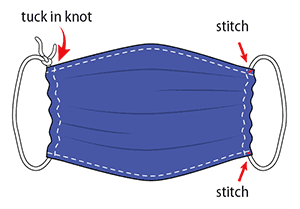
4. Gently pull on the elastic so that the knots are tucked inside the hem. Gather the sides of the mask on the elastic and adjust so the mask fits your face. Then securely stitch the elastic in place to keep it from slipping.
Non-sewn Mask
Materials
- Washable, breathable fabric (cut approximately 20”x20”)
- Rubber bands (or hair ties)
- Scissors (if you are cutting your own cloth)
Tutorial

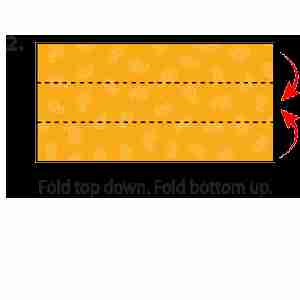

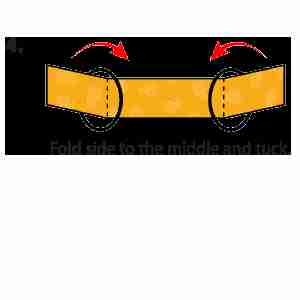
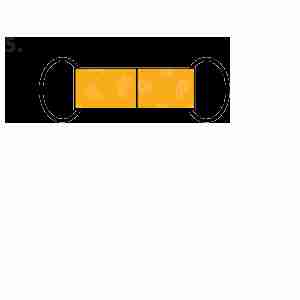
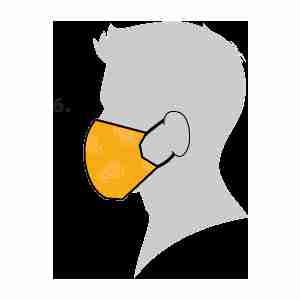
Make sure your mask:
- fits snugly but comfortably against the side of the face
- completely covers the nose and mouth
- is secured with ties or ear loops
- includes multiple layers of fabric
- allows for breathing without restriction
- can be laundered and machine dried without damage or change to shape